Blend Profiles
Categories:
Blend Profiles are data assets that define how the camera transitions when control shifts from one Phantom Camera to another. Without a Blend Profile, transitions are instantaneous. A well-authored Blend Profile is often the single largest contributor to a camera system feeling polished rather than mechanical.
For architecture details, asset structure, and extending the system in C++, see the Framework API reference.
Contents
- What a Blend Profile Contains
- How Blend Profiles Are Referenced
- Creating a Blend Profile Asset
- Easing Curve Reference
- ScriptCanvas — Triggering a Blend
- Quick Reference
- Glossary
- See Also
What a Blend Profile Contains
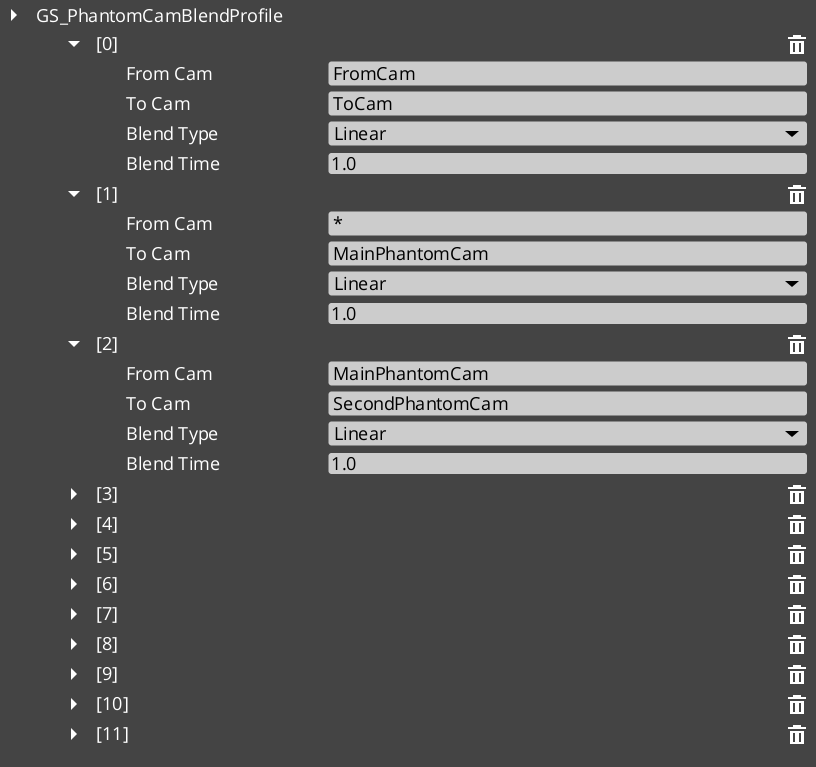
Each GS_PhantomCamBlendProfile asset defines the shape of a single camera transition:
| Field | Purpose |
|---|---|
| Duration | How long the blend takes, in seconds. |
| Position Easing | The easing curve applied to position interpolation. Controls how the camera accelerates and decelerates as it moves toward the new position. |
| Rotation Easing | The easing curve applied to rotation interpolation. Can be set independently from position easing. |
| FOV Easing | The easing curve applied to field-of-view interpolation. |
Position, rotation, and FOV each have independent easing settings. This makes it straightforward to compose transitions that feel distinct in each axis — for example, position eases out slowly while rotation snaps quickly, or FOV leads the transition while position lags.
How Blend Profiles Are Referenced
Creating a Blend Profile Asset
Blend Profile assets are created from the Asset Browser in the O3DE Editor:
- Right-click in the Asset Browser where you want to store the profile.
- Select Create Asset → GS_PhantomCamBlendProfile.
- Name the asset descriptively — for example,
CombatCameraBlendorCinematicSoftBlend. - Open the asset to edit duration and easing curves.
- Assign the asset to one or more Phantom Camera components in the level.
Easing Curve Reference
Easing curves control the acceleration profile of an interpolation. Common choices and their camera feel:
| Curve | Feel |
|---|---|
| Linear | Mechanical, even movement. Rarely used for cameras. |
| EaseIn | Starts slow, accelerates. Camera hesitates before committing. |
| EaseOut | Starts fast, decelerates. Camera arrives gently. |
| EaseInOut | Slow start and end, fast through the middle. Most natural for most transitions. |
| EaseOutBack | Slight overshoot before settling. Adds energy to arriving at a new view. |
ScriptCanvas — Triggering a Blend
Blends trigger automatically when the dominant Phantom Camera changes. To trigger a blend from script, simply change which camera is active or dominant:
[Custom Event → EnterCombat]
    └─► [EntityId → Set Active (combat camera entity)]
            └─► Cam Manager detects priority change
            └─► Blend Profile on combat camera governs the transition
            └─► Cam Core interpolates position, rotation, FOV over blend duration
There is no separate “start blend” call. The blend begins the moment the Cam Manager determines a new dominant camera and ends when Cam Core finishes interpolating.
Quick Reference
| Need | How |
|---|---|
| Create a blend profile | Asset Browser → Create Asset → GS_PhantomCamBlendProfile |
| Assign a profile to a camera | Set the Blend Profile reference in the Phantom Camera component properties |
| Make a transition instant | Leave the Blend Profile reference empty on the Phantom Camera |
| Share one profile across many cameras | Assign the same asset reference to multiple Phantom Camera components |
| Change blend timing without changing cameras | Edit the Blend Profile asset — all cameras referencing it update automatically |
Glossary
| Term | Meaning |
|---|---|
| Blend Profile | A data asset defining duration and per-axis easing curves for camera transitions |
| Position Easing | The easing curve controlling how the camera accelerates/decelerates in position |
| Rotation Easing | The easing curve controlling rotation interpolation independently from position |
For full definitions, see the Glossary.
See Also
For the full API, component properties, and C++ extension guide:
For related systems:
Get GS_PhantomCam
GS_PhantomCam — Explore this gem on the product page and add it to your project.