The Cam Manager is the camera system’s singleton manager. It integrates with GS_Core’s standard manager lifecycle, handles the camera system’s startup and shutdown through the two-stage initialization sequence, and maintains awareness of which Phantom Camera is currently dominant. Any time the active camera changes, the Cam Manager broadcasts a notification so dependent systems can react without polling.
For architecture details, component properties, and extending the system in C++, see the Framework API reference.
Contents
- Manager Lifecycle
- Enabling and Disabling the Camera System
- Tracking the Active Camera
- Suspending the Camera System
- Changing the Camera Target
- Three Authoring Tiers
- Entity Configuration
- Quick Reference
- Glossary
- See Also
Manager Lifecycle
The Cam Manager is a GS_ManagerComponent and participates in the standard GS_Core startup sequence. It activates alongside all other managers during the two-stage initialization, making it safe to call camera system methods any time after OnStartupComplete.
| Stage | What Happens |
|---|---|
| Initialize | Cam Manager activates and registers with the camera pipeline. |
Startup (OnSetupManagers) | Manager is initialized. Safe to query camera state. |
Complete (OnStartupComplete) | All managers ready. Safe to enable or disable the camera system. |
Enabling and Disabling the Camera System
The camera system can be suspended and resumed independently of other gameplay systems. This is used during UI-only states, loading screens, or when a cinematic takes direct control of the camera.
| Notification | What It Does |
|---|---|
EnableCameraSystem | Activates the camera system. Phantom Cameras resume competing for priority. |
DisableCameraSystem | Suspends the camera system. The real camera stops receiving updates from Phantom Cameras. |
Both events are on CamManagerNotificationBus. Broadcast them to switch the camera system state from any script or component.
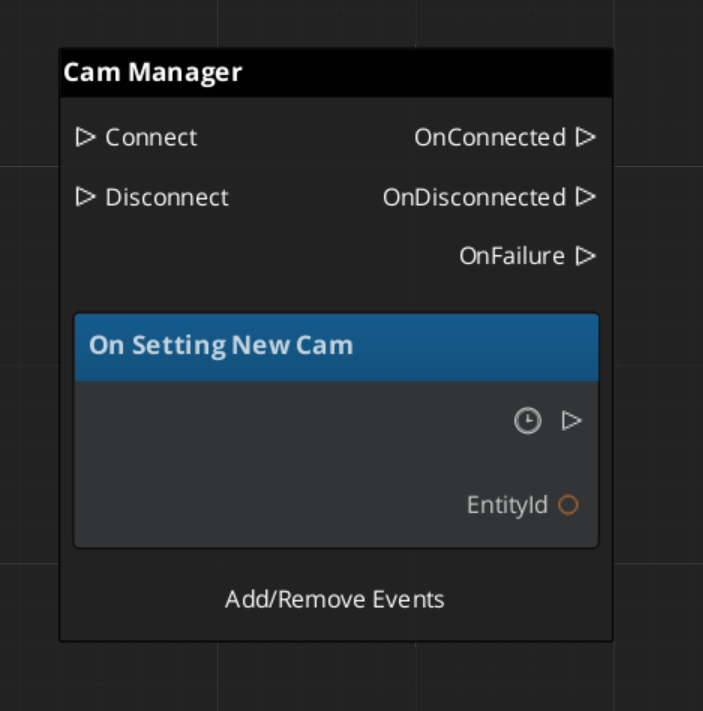
Tracking the Active Camera
The Cam Manager broadcasts SettingNewCam on CamManagerNotificationBus whenever a different Phantom Camera becomes dominant. This fires any time a camera with higher priority activates, a dominant camera deactivates, or a blend resolves to a new target.
Use this event in any system that needs to know which camera is currently active — aiming reticles, world-space UI elements, minimaps, or audio listener positioning.
ScriptCanvas
Suspending the Camera System
ScriptCanvas
Broadcast DisableCameraSystem to suspend camera updates, for example when a cutscene takes direct camera control:
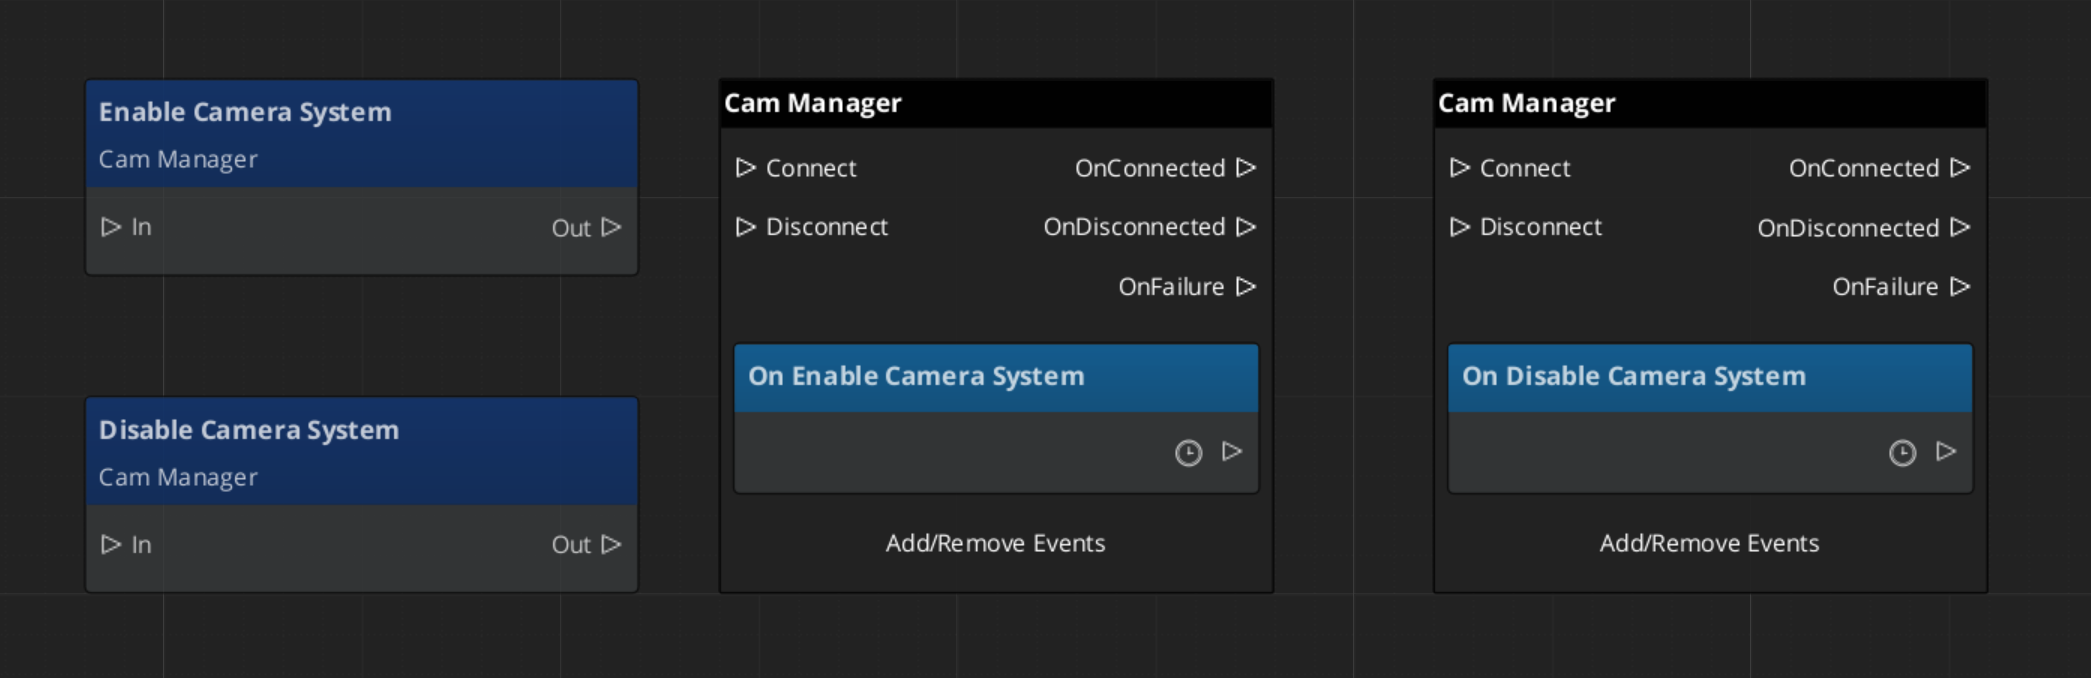
Because DisableCameraSystem and EnableCameraSystem are notifications rather than requests, they are fire-and-forget. Any script can broadcast them.
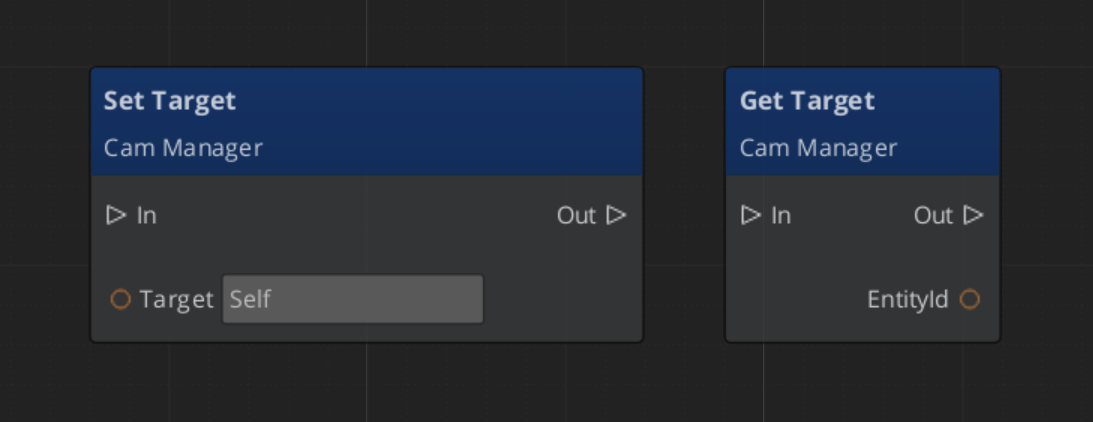
Changing the Camera Target
ScriptCanvas
The follow target, designated by the CamManager, can be set with Get/Set Target:
Three Authoring Tiers
The Cam Manager exposes three top-level fields that control how the camera system is configured for your project. Most single-player projects use Tier 1; multi-player or split-screen projects use Tier 3.
| Tier | Cam Manager configuration | When to choose it |
|---|---|---|
| Tier 1 — Single Cam | m_primaryRigPrefab set, m_enableInstancedChannels = false | Single-player projects with a normal camera rig. The default for most games. |
| Tier 2 — Level-placed CamCore | No primary rig prefab, m_enableInstancedChannels = false | Legacy single-player flow where the Cam Core is hand-placed in each level. |
| Tier 3 — Multi-Channel | m_enableInstancedChannels = true, m_channelConfigs populated | Split-screen, local co-op, or cinematic projects that need per-player rigs and arbitration. |
For the full step-by-step walkthrough of each tier — including common Tier 3 patterns (shared cinematic cams, hero-perspective cams, cross-channel dispatch) and the lobby flow for variable player counts — see the dedicated Channels page:
Cam Manager Entity Configuration
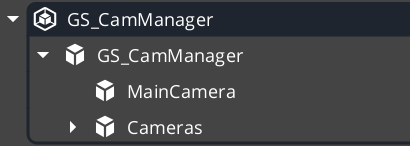
In Tier 1, assign your rig prefab (containing a Cam Core and any cams that should persist with the manager) to the Cam Manager’s Primary Rig Prefab field. The Cam Manager spawns the rig at startup.
In Tier 2, hand-place the Cam Core entity as a child of the Cam Manager. Any phantom cameras that should persist between stage changes can sit alongside the Cam Core.
In Tier 3, populate m_channelConfigs with one entry per supported player slot — see Channels & Instancing.
Across all tiers, the PossessedUnit event on a player controller is a convenient way to push the camera target the moment the player unit spawns.
Quick Reference
| Need | Bus | Method / Event |
|---|---|---|
| Enable the camera system | CamManagerNotificationBus | EnableCameraSystem |
| Disable the camera system | CamManagerNotificationBus | DisableCameraSystem |
| Set the camera target (single-player) | CamManagerRequestBus | SetTarget(playerEntityId) |
| Set a channel’s target (multi-channel) | CamManagerRequestBus | SetChannelTarget(channelId, entity) |
| Know when the active camera changes (single-player) | CamManagerNotificationBus | SettingNewCam(newCamEntityId) |
| Know when a channel’s active cam changes (multi-channel) | CamManagerNotificationBus | SettingNewCamOnChannel(channelId, cam) |
| Spawn / despawn a channel mid-session | CamManagerRequestBus | EnableChannel(id) / DisableChannel(id) |
| Set the engine’s active main view | CamManagerRequestBus | SetActiveChannel(id) or SetActiveCamCore(camCore) |
Glossary
| Term | Meaning |
|---|---|
| Cam Manager | The singleton manager for the PhantomCam system that tracks active cameras and broadcasts changes |
| Dominant Camera | The Phantom Camera with the highest priority that currently drives the real camera |
For full definitions, see the Glossary.
See Also
For the full API, component properties, and C++ extension guide:
For related systems:
- The Basics: Channels & Instancing
- The Basics: Phantom Cameras
- The Basics: Cam Core
- The Basics: GS_Managers
- The Basics: Unit Controllers
Get GS_PhantomCam
GS_PhantomCam — Explore this gem on the product page and add it to your project.